
Stage environment offers a cost-conscious pre-production setup with the same client/API/database topology as production.
Taking ownership of the Stage environment
Clone the template repositories
Fork or clone the following to your local machine or GitHub account:
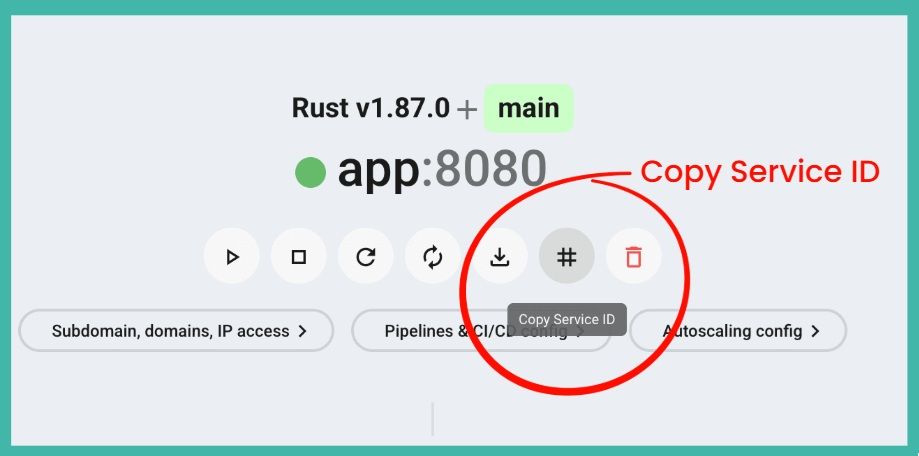
1. Find your service name
Many commands and configurations need the exact name of your service. You can find it in the Zerops Dashboard.
- Open your project in the Zerops Dashboard.
- In the project overview, find the service you want to manage.
- Use this exact name whenever a command or pipeline configuration asks for
<service-name>.
2. Configure deployment pipeline
In Service Settings > Pipelines & CI/CD Settings in the Zerops Dashboard, connect your repository.
For staging, use a trigger on push to your staging branch, such as main, develop, or staging. This deploys every change pushed to that branch automatically.
If you want more control, you can use zcli push in your existing CI/CD pipeline instead.
Learn more about pipeline triggers: https://docs.zerops.io/features/pipeline
GitHub integration: https://docs.zerops.io/references/github-integration
GitLab integration: https://docs.zerops.io/references/gitlab-integration
Tip
To skip builds for documentation-only changes, add [ci skip] or [skip ci] to your commit message. The webhook is still delivered, but Zerops will not start a build.
3. Deploy to staging
Push to your configured branch to trigger a new staging deployment:
git add .
git commit -m "feat: add new feature for staging"
git push origin mainTip
Open the pipeline detail in the Zerops Dashboard to check the build progress, review logs, and verify that all steps finish successfully. This helps you catch issues early and improve build times.
🎉 You are good to go!
Your staging deployment is triggered and the core setup is complete.
The following section is optional. You can stop here unless you need to configure public access rules for your staging environment.
4. Set up HTTP access (Optional)
Configure public access to your staging application in Service Settings > Public Access & Internal Ports in the Zerops Dashboard.
You have two common options:
Zerops subdomain
Use the Zerops subdomain for instant access without DNS configuration. This is usually enough for staging and QA testing.
Enable it in the Zerops Dashboard or in zerops.yaml:
enableSubdomainAccess: trueCustom domain
Use a custom domain if your staging environment needs a stable public URL.
Add your domain in the Zerops Dashboard and configure your DNS records with the values provided by Zerops.
See the public access documentation for details: https://docs.zerops.io/features/access
Tip
For staging environments, the Zerops subdomain is often enough and avoids DNS propagation delays. Save custom domains for production unless staging specifically needs one.
Deploy more environments
Related platform & services docs
Related Recipes
More recipes with similar technologies and categories.

TanStack Start Hello World
A server-rendered TanStack Start application with Nitro Node output, deployed on Zerops. Includes ready-made environment configurations for the full development lifecycle.

React (Vite) Static Hello World
A complete React + Vite hello world recipe for Zerops, demonstrating static site deployment with build-time environment variable injection — compiled by Node.js, served by Nginx, ready-made for every stage of the development lifecycle.

React Router Static Hello World
A complete React Router v7 hello world recipe for Zerops — deploying a React Router v7 SPA (static mode, no SSR) as a static site built by Node.js and served by Nginx, with ready-made environment configurations demonstrating build-time environment variable injection via Vite.
React Router SSR Hello World
A minimal server-side rendered application built with React Router v7 on Zerops, connecting to a PostgreSQL database. Includes ready-made environment configurations for every stage of the development lifecycle - from AI agent workspaces through local development to highly-available production.