Small production environment offers a production-ready setup optimized for moderate throughput.
Taking ownership of the Small Production environment
Clone the template repositories
Fork or clone the following to your local machine or GitHub account:
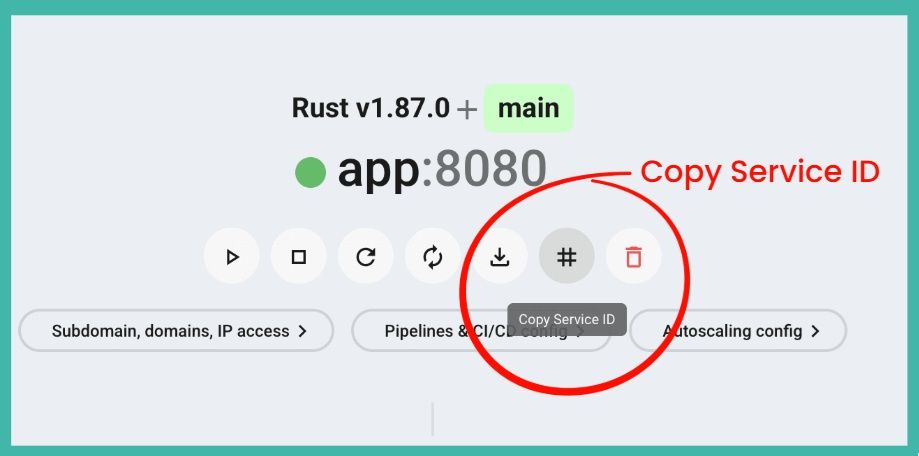
1. Find your service name
Many commands and configurations need the exact name of your service. You can find it in the Zerops Dashboard.
- Open your project in the Zerops Dashboard.
- In the project overview, find the service you want to manage.
- Use this exact name whenever a command or pipeline configuration asks for
<service-name>.
2. Configure deployment pipeline
Go to Service Settings > Pipelines & CI/CD Settings in the Zerops Dashboard and connect your repository.
For production, use a trigger on new tags. This keeps deployments intentional and tied to a specific version. You can also add a regex filter, such as ^v[0-9]+\.[0-9]+\.[0-9]+$, if you want to allow only semantic version tags.
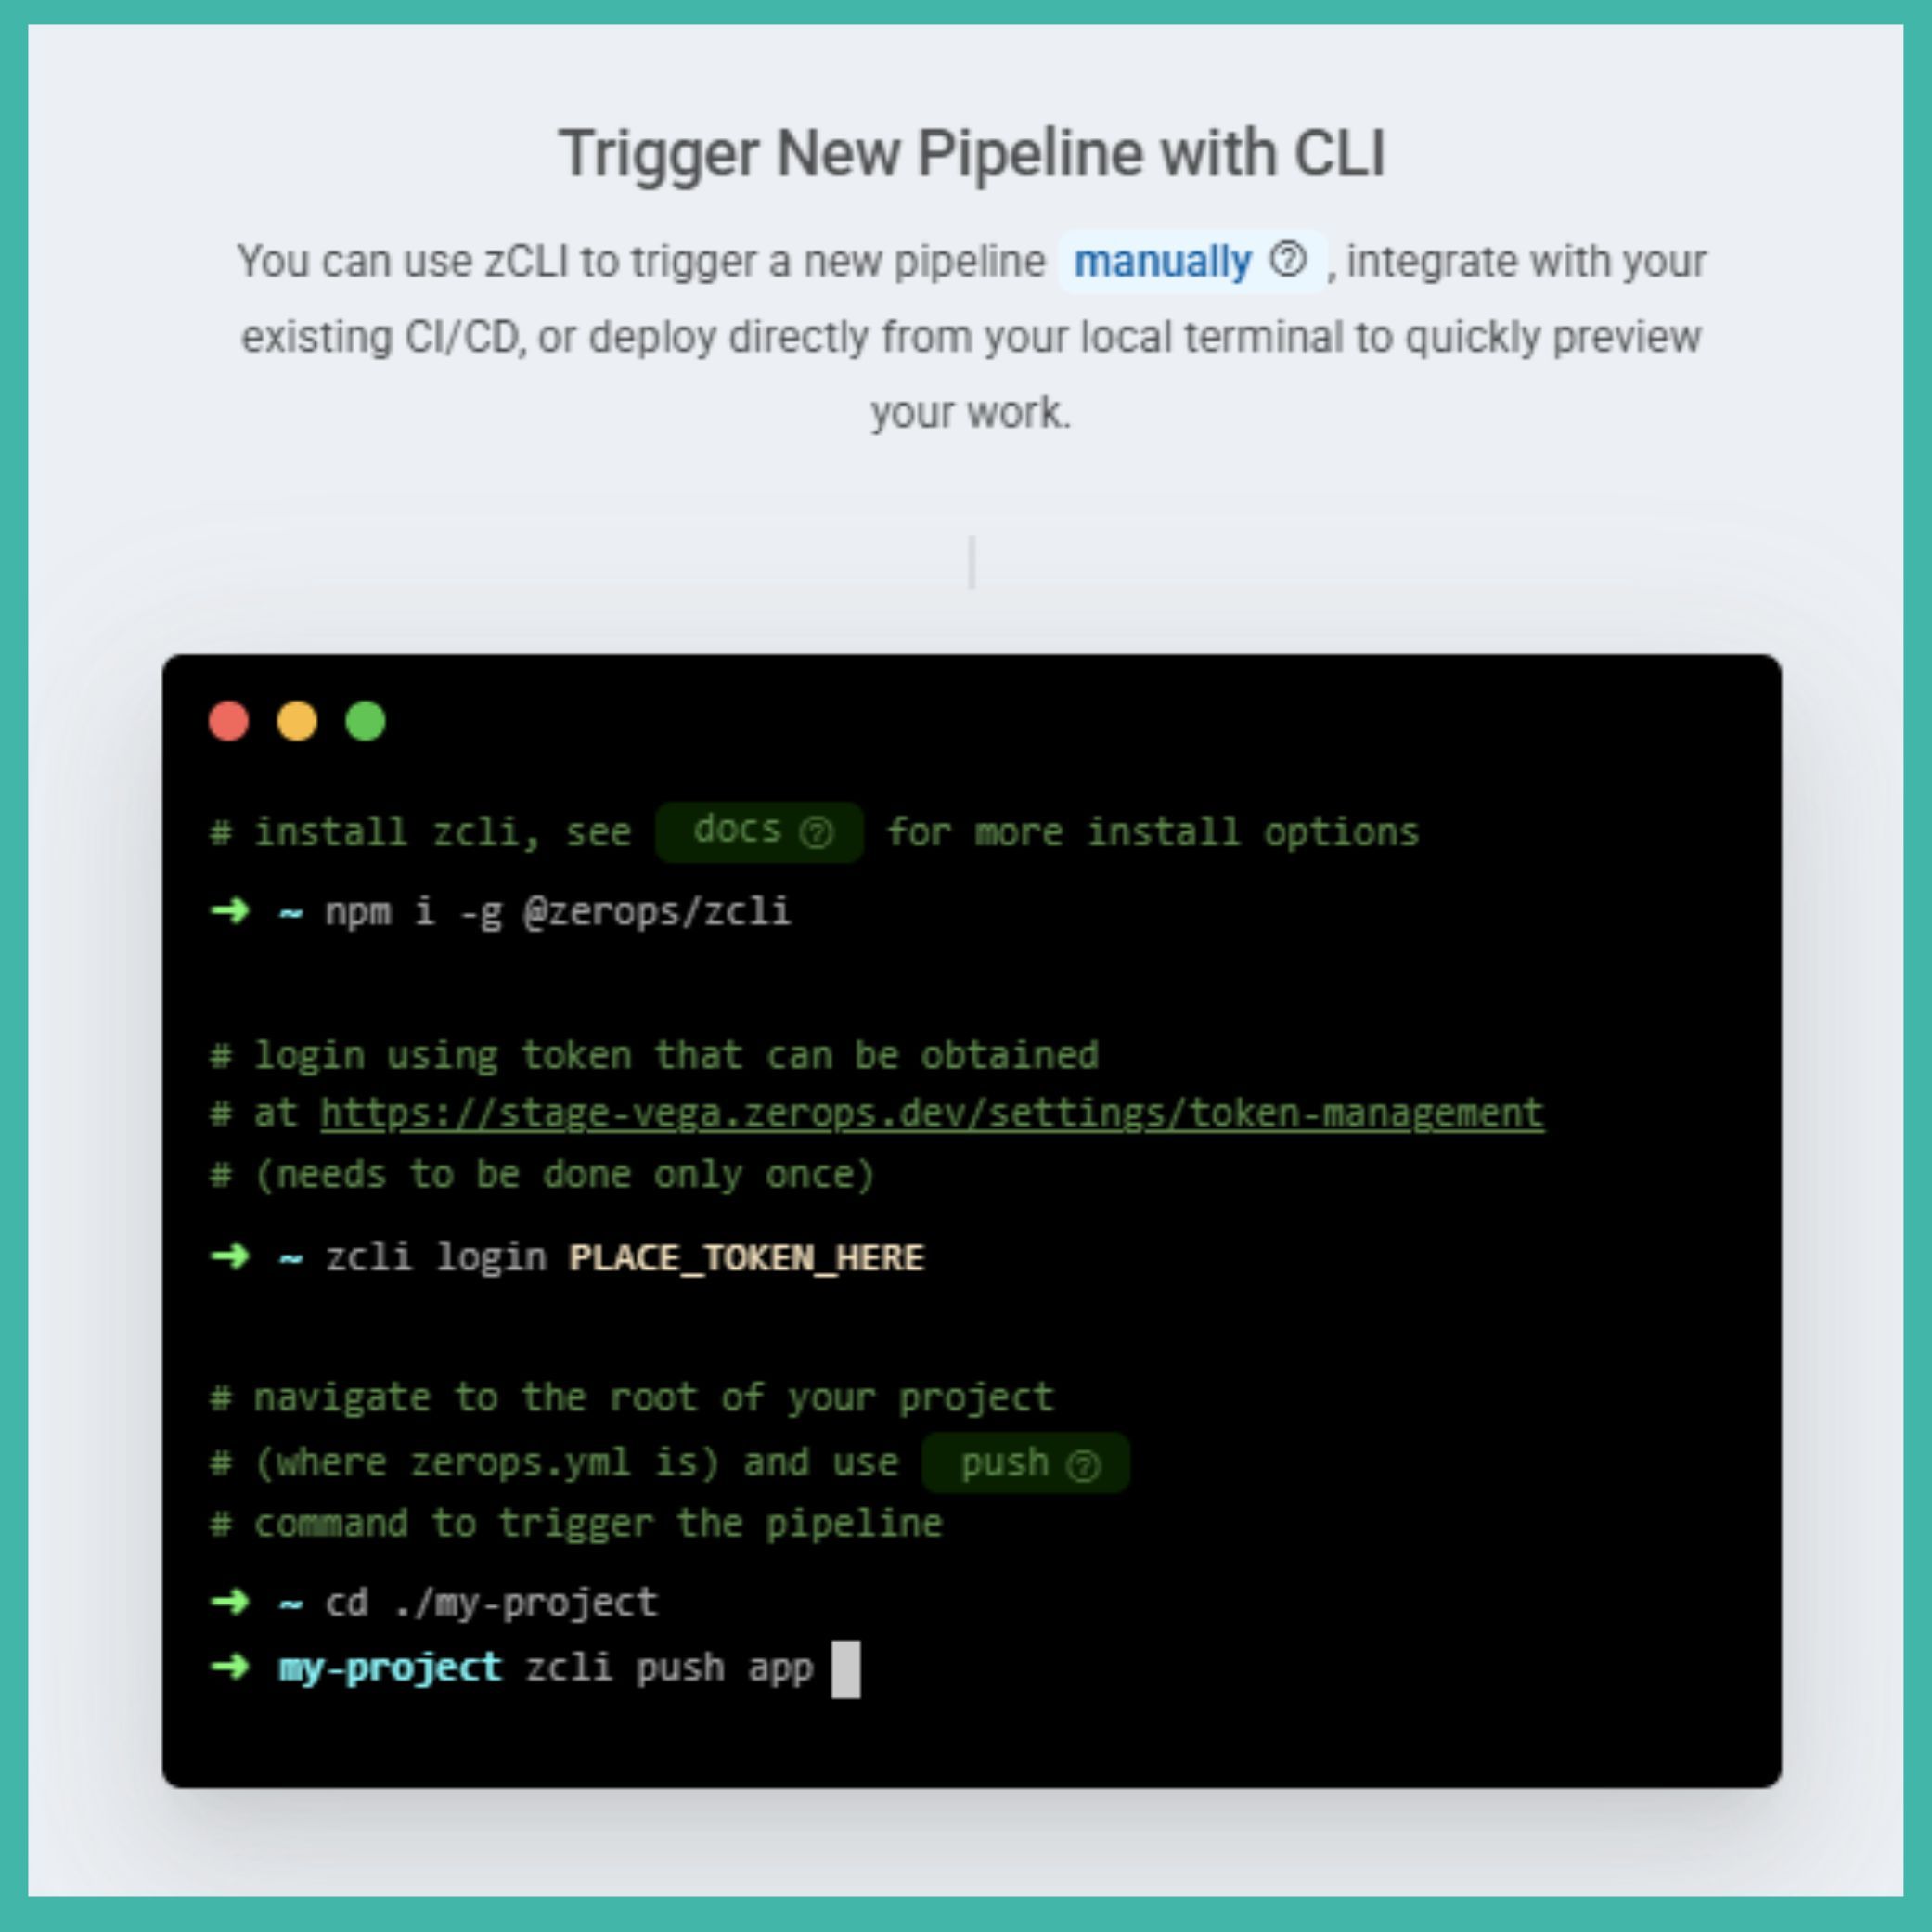
Alternatively, add zcli push to your existing CI/CD pipeline if you want full control over when deployments happen.
Learn more about pipeline triggers: https://docs.zerops.io/features/pipeline
3. Deploy to production
Create and push a new Git tag to deploy a specific version of your app:
git tag -a v1.0.0 -m "Release version 1.0.0"
git push origin v1.0.0Tip
Open the pipeline detail in the Zerops Dashboard to check the build progress and verify that all steps finish successfully.
4. Configure autoscaling
Review the autoscaling settings for your runtime services and databases in Service Settings > Automatic Scaling Configuration in the Zerops Dashboard.
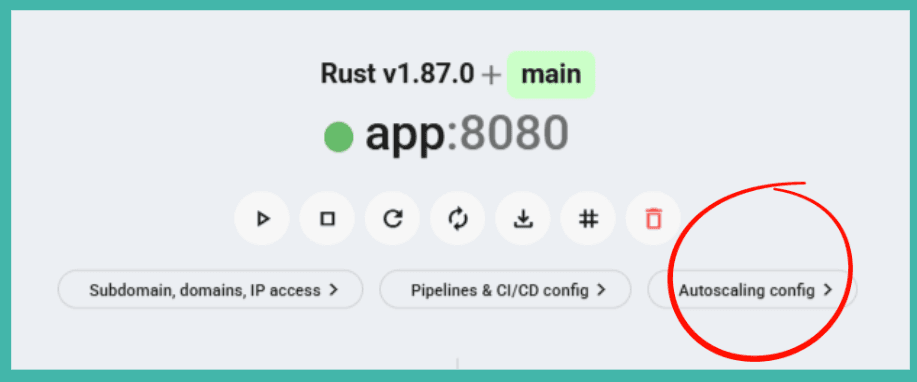
The most important settings are:
verticalAutoscaling:
  minRam: 1
  minFreeRamGB: 0.5
minFreeRamPercent: 20Caution
Pay attention to minFreeRamGB. This value tells Zerops when to scale RAM vertically. Adjust it based on your app’s real memory needs. RAM scales up immediately, while CPU scales after two consecutive measurements below the threshold.
Tip
Run a quick stress test with a tool like hey before real users arrive. This helps you see how your app behaves under load and tune the autoscaling settings.
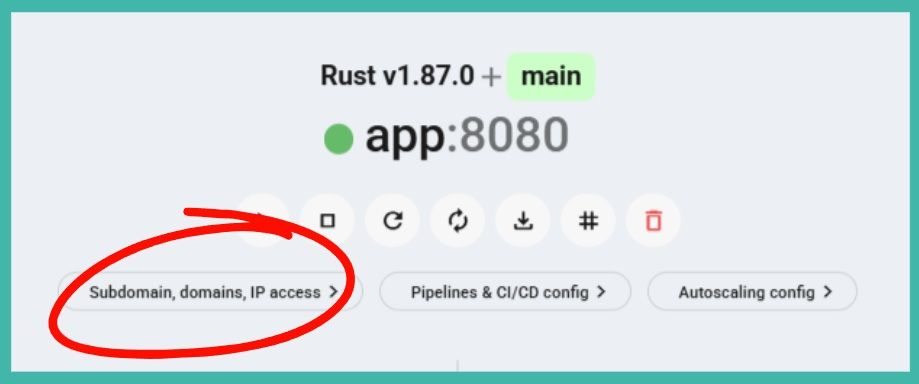
5. Set up your domain
To send real traffic to your app, configure public HTTP access in Service Settings > Public Access & Internal Ports in the Zerops Dashboard.
Add your custom domain and point your DNS records to the Zerops IPs shown in the dashboard:
Type   Name          Content          TTL
A      example.com   <zerops-ipv4>    Auto
AAAA   example.com   <project-ipv6>   Auto
For wildcard domains, add a CNAME record for SSL validation.
Check the public access documentation: https://docs.zerops.io/features/access
Tip
When changing DNS records for production, start with a low TTL value. Make sure SSL certificates are active before you disable the fallback Zerops subdomain.
Once everything works, you can disable the Zerops subdomain so all traffic goes through your custom domain.
🎉 You are good to go!
Your application is live in production and the core setup is complete.
The following sections are optional. They cover extra production features such as log forwarding, backups, and diagnostic access. You can stop here and come back later when you need them.
6. Set up log forwarding (Optional)
To send logs to an external service, go to Project Settings > Log Forwarding & Logs Overview in the Zerops Dashboard.
You can forward logs to services like Better Stack, Papertrail, or your own self-hosted solution.
Learn more about log forwarding: https://docs.zerops.io/references/logging
7. Configure database backups (Optional)
Manage automated encrypted backups in Service Settings > Backups in the Zerops Dashboard.
By default, backups run daily between 00:00 and 01:00 UTC.
Before a major deployment, create a manual protected backup:
zcli backup create <db-service> --tags pre-deploy,protectedRead the backup documentation for more options: https://docs.zerops.io/features/backup
8. Set up diagnostic access (Optional)
Use zCLI and VPN access when you need to inspect or maintain services directly.
For runtime services:
zcli vpn up
ssh <service-name>.zerops
For databases, connect through the VPN to reach the project’s private network, or set up secure direct IP access for your database admin tools.
Check the VPN documentation: https://docs.zerops.io/references/cli/commands#vpn-up
Deploy more environments
Related platform & services docs
Related Recipes
More recipes with similar technologies and categories.

Astro SSR Hello World
A minimal Astro SSR application with a server-rendered health check page that connects to a PostgreSQL database, runs idempotent migrations, and queries live data — demonstrating the full Zerops SSR integration pattern.

Bun Hello World
A Bun application connected to PostgreSQL, running on Zerops with six ready-made environment configurations — from AI agent and remote development to stage and highly-available production.
Go Hello World
Go recipe for Zerops — a minimal HTTP server backed by PostgreSQL, showcasing idempotent database migrations, environment-variable-driven configuration, and the complete set of Zerops infrastructure patterns across six ready-to-deploy environment configurations.

Zerops showcase
Production-ready image processing pipeline showcasing distributed architecture on Zerops — a Bun + React frontend with real-time WebSocket updates and live architecture visualization, a Python worker for async image processing via NATS, backed by PostgreSQL, Valkey, and S3-compatible object storage.